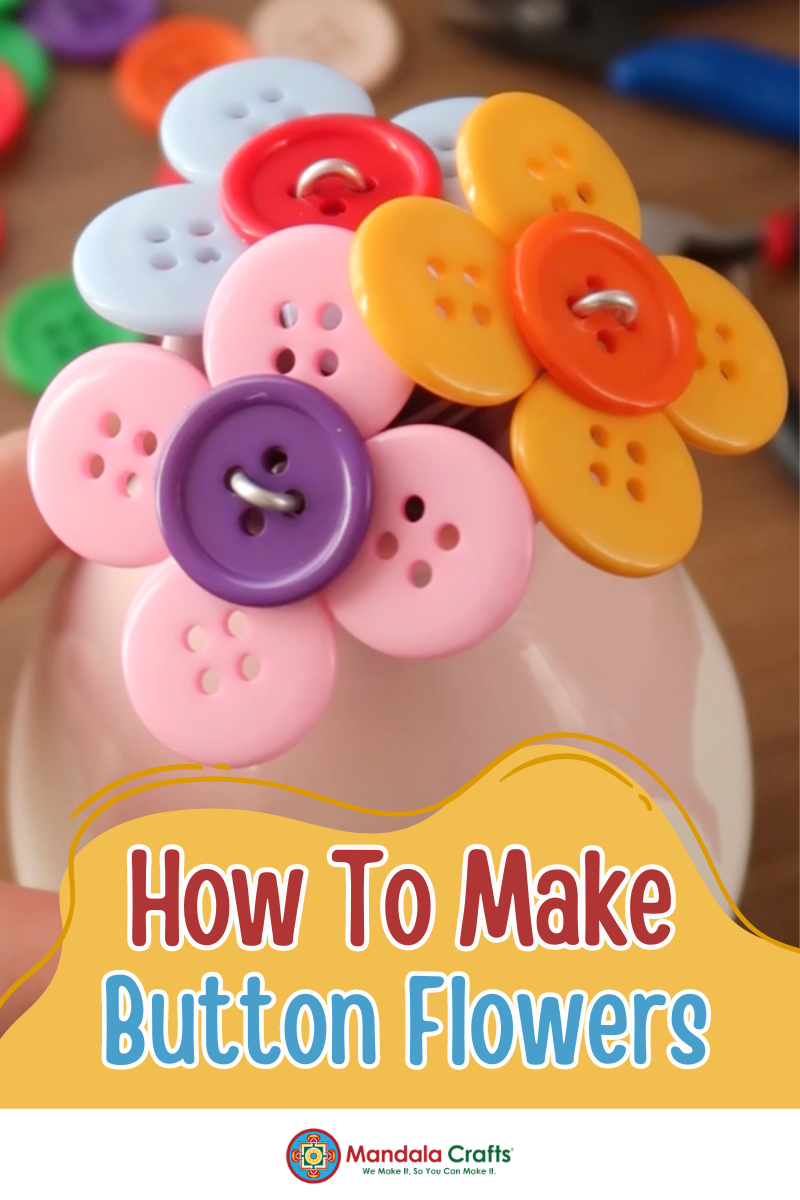
Looking for a fun and easy DIY craft project that’s perfect for any age? Look no further! These adorable DIY button flowers are simple to make, budget-friendly, and a charming way to add a pop of color to any space. Using Mandala Crafts products, you can create beautiful, unique button flowers in just a few steps.
Materials Needed
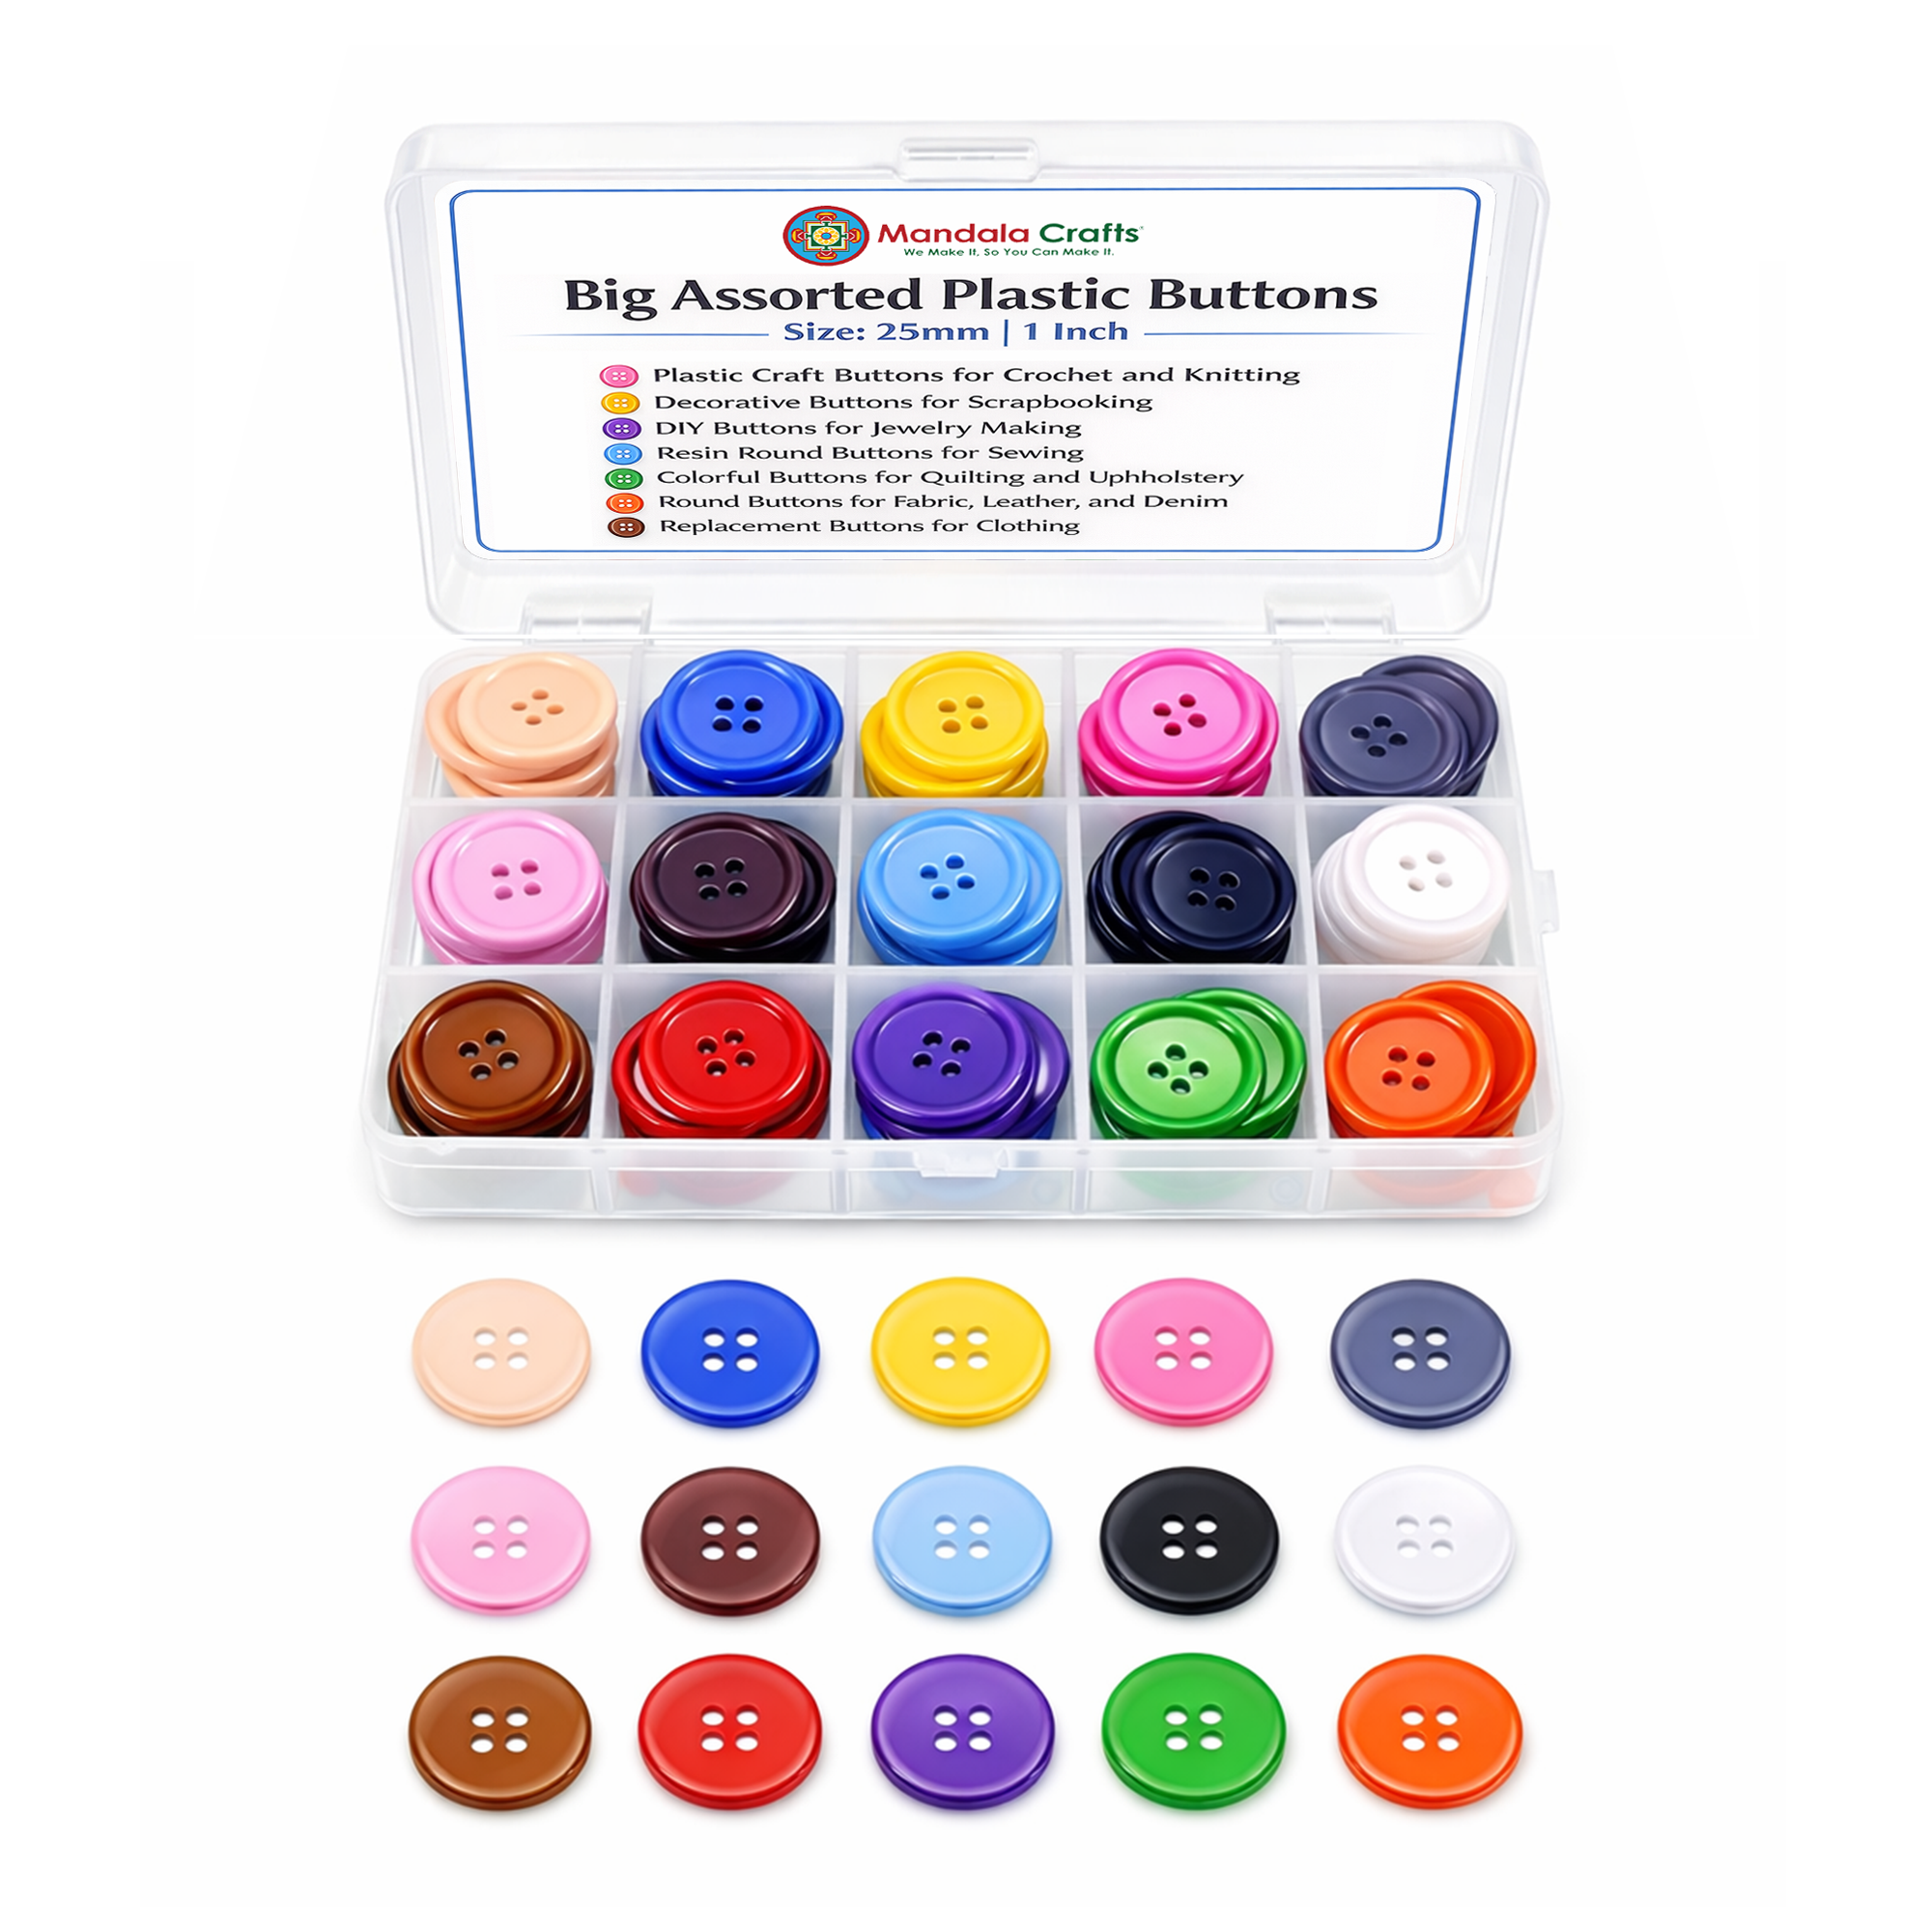
- Acrylic Buttons
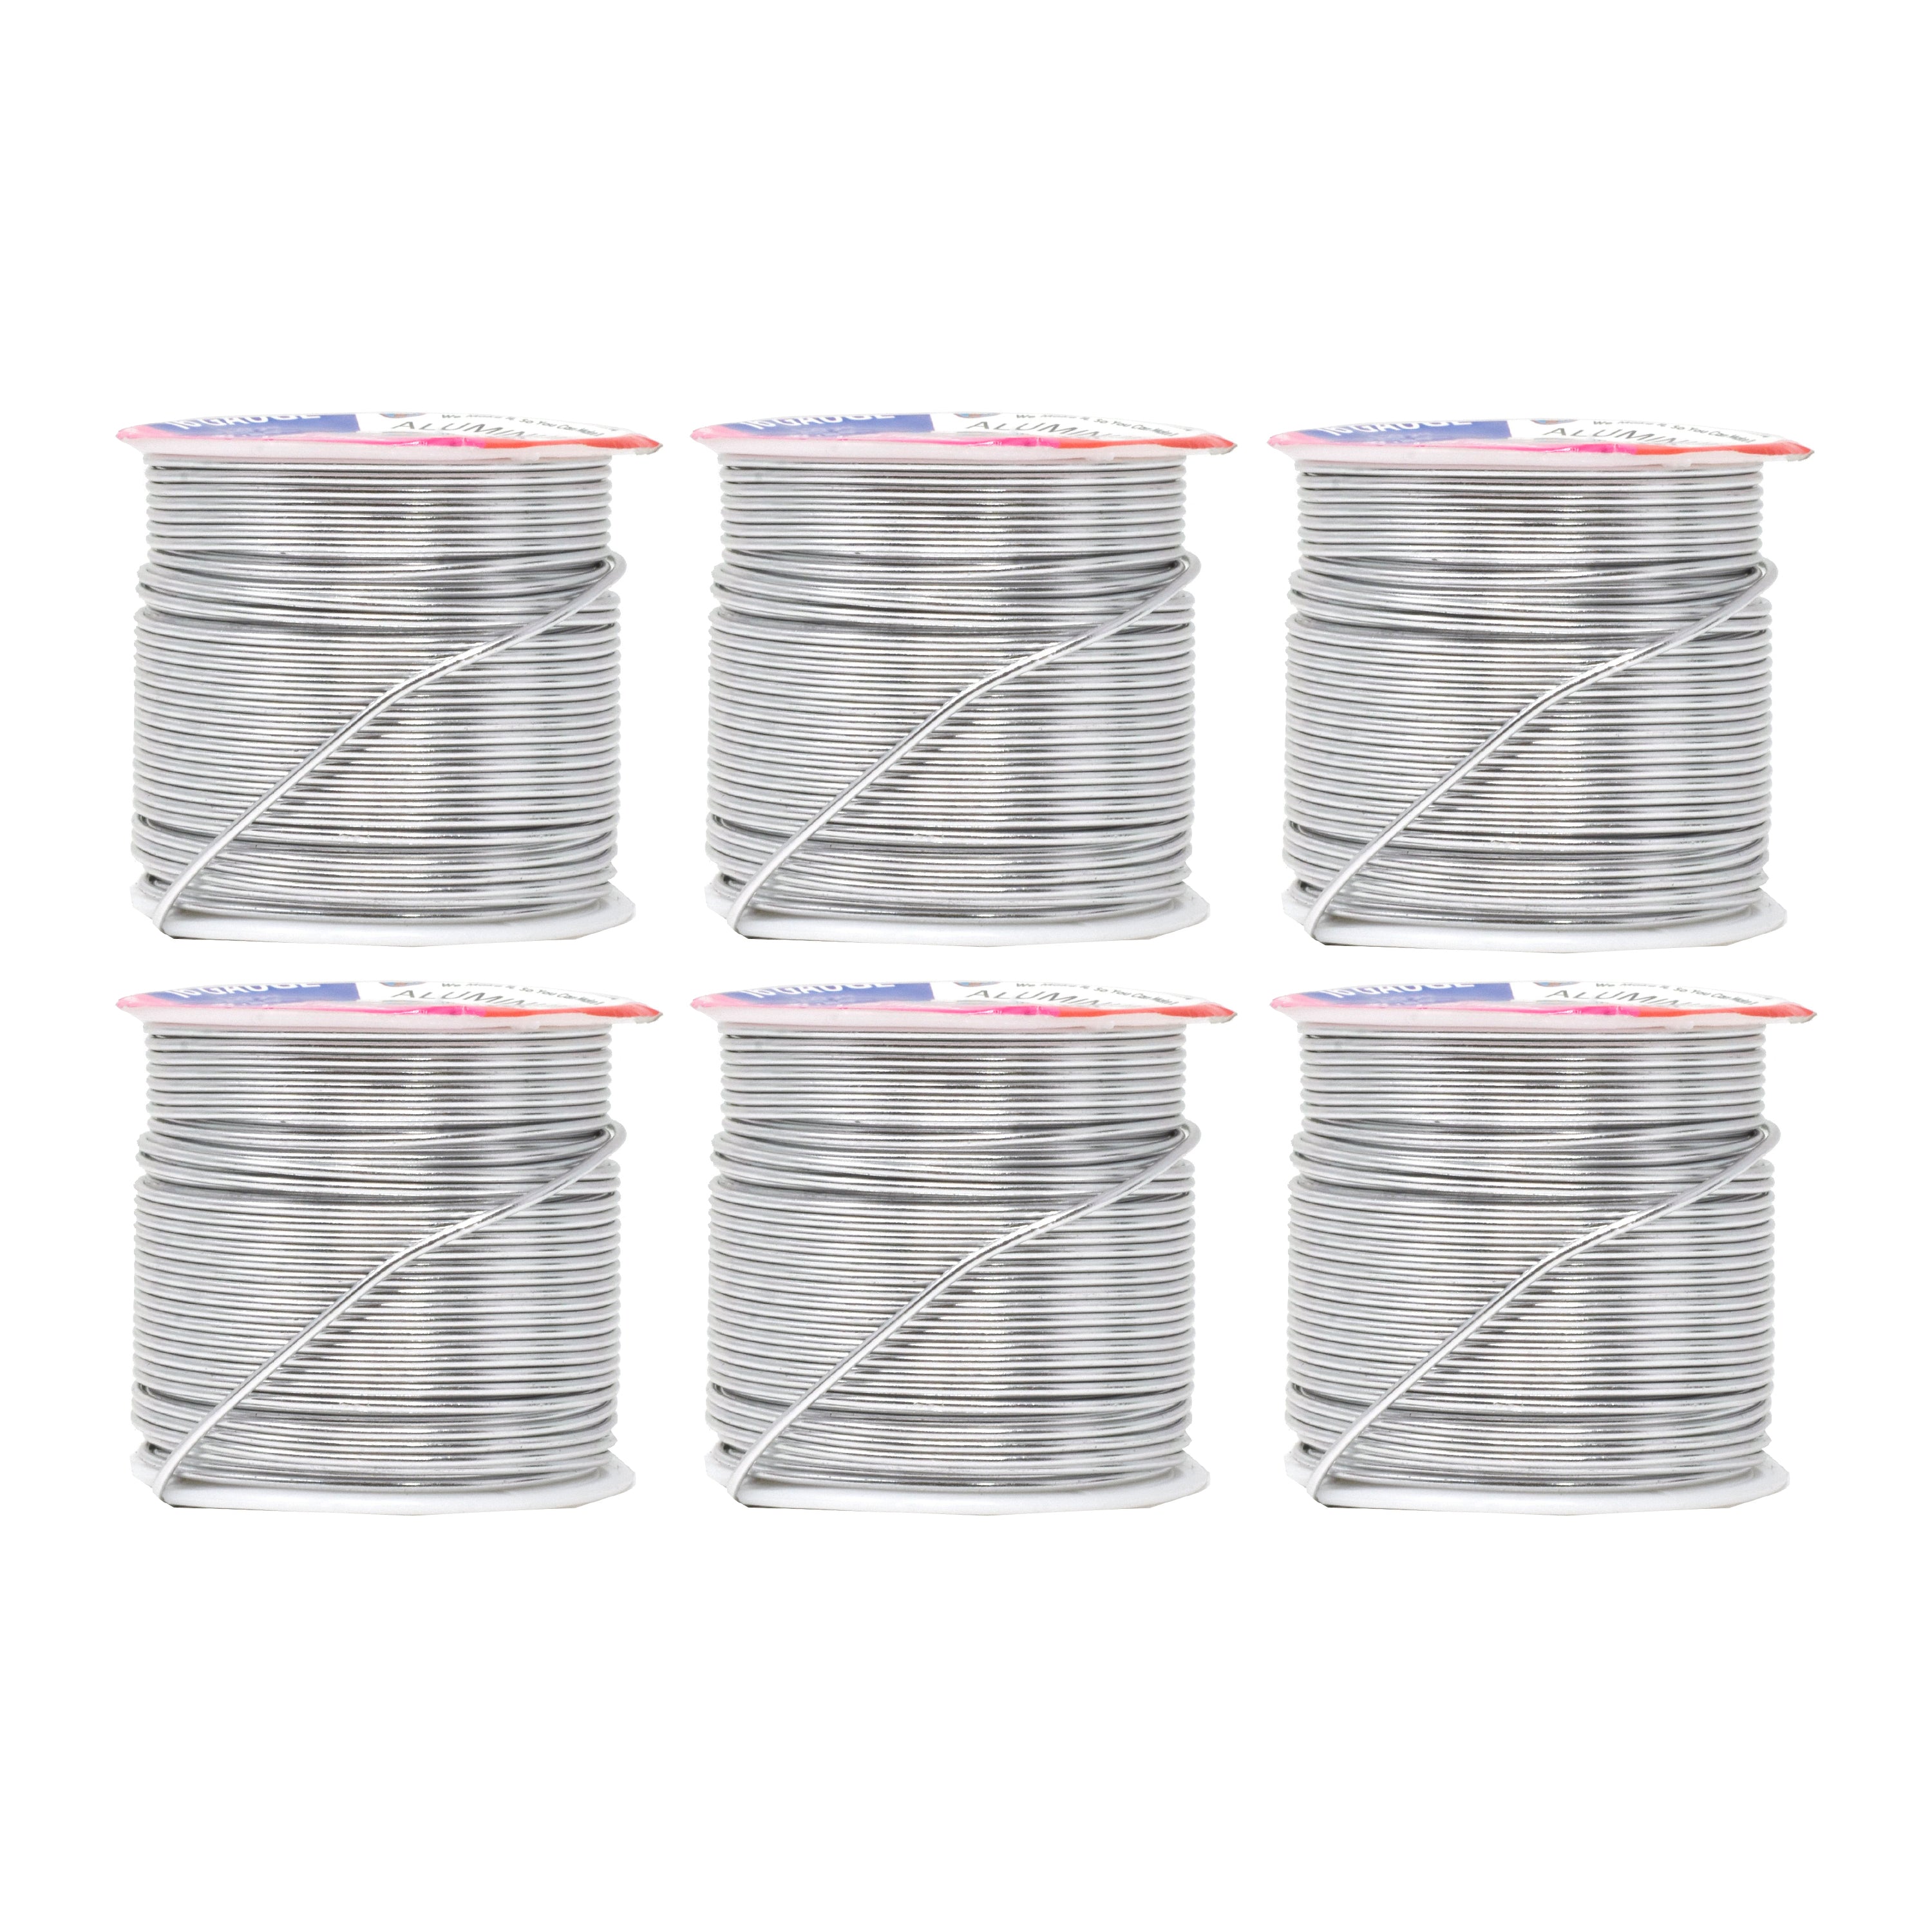
- 1.5mm Aluminum Craft Wire
- E6000 Glue
- Wire Cutters
- Needle Nose Pliers

Step 1: Choose Your Buttons
Select four acrylic buttons of the same size for the petals of your flower. Then, choose another button to serve as the center. Arrange the four petal buttons in a square pattern. Make sure the colors and styles complement each other for a cohesive look. You can mix and match colors or stick to a single shade—it’s entirely up to you!


Step 2: Glue the Buttons Together
Once you’ve arranged the four buttons in a square shape, apply a small amount of E6000 glue to the center of each button. Place your chosen center button on top of the four buttons, pressing down gently to ensure all five buttons are fused together. Allow the glue to dry completely before moving on to the next step. This should take about 10-15 minutes.


Step 3: Prepare the Wire for the Stem
Take a piece of Mandala Crafts 1.5mm wire, at least 12-16 inches long. Fold the wire in half, creating a loop at the top. This loop will serve as the base for threading the wire through the button holes in the center of your flower.


Step 4: Attach the Stem to the Flower
Carefully thread the looped wire through two opposite holes of the center button on your flower. Pull the wire through until the flower sits snugly on the wire’s looped end. Using needle nose pliers, pinch the wire tightly at the base of the flower to secure it in place.

Step 5: Twist the Wire to Create the Stem
With your flower securely in place, begin twisting the two ends of the wire together, starting right at the base of the flower. Continue twisting until you reach the end of the wire, creating a sturdy and decorative stem. Trim any excess wire with wire cutters if needed.

Step 6: Style and Display Your Button Flowers
Your DIY button flower is now complete! Repeat the process to create more flowers in various colors and styles. Arrange them in a vase, attach them to a gift, or use them to embellish home decor projects. The possibilities are endless!


These button flowers are perfect for crafters of all ages. They’re easy to make, require minimal supplies, and allow for plenty of creativity. Plus, they’re a great way to use up extra buttons and wire you might already have on hand. Whether you’re looking to brighten up a room or create a thoughtful handmade gift, these DIY button flowers are a fantastic option!

Happy crafting, and don’t forget to share your button flower creations with us on Instagram! Tag us with #madewithmandala @mandalacraftsinc to show off your unique designs. 🌸
@mandalacraftsinc Florals for spring… groundbreaking 😉🌸 dreaming of warmer weather ahead? Try this fun DIY! Products Used: • Mandala Crafts Acrylic Buttons • Mandala Crafts 1.5mm Wire • E6000 Glue • wire cutters • needle nose pliers #madewithmandala #mandalacraftsinc #diycraftideas #diyproject #diycraft #simplediycrafts #diycraftsandactivities #craftmaking #craftsupplies #craftsforkids #kidscrafts #kidscraftideas #springdiy #wireart #artwire #wireartwork #wirecrafts ♬ Follow Her - Zeeky Beats