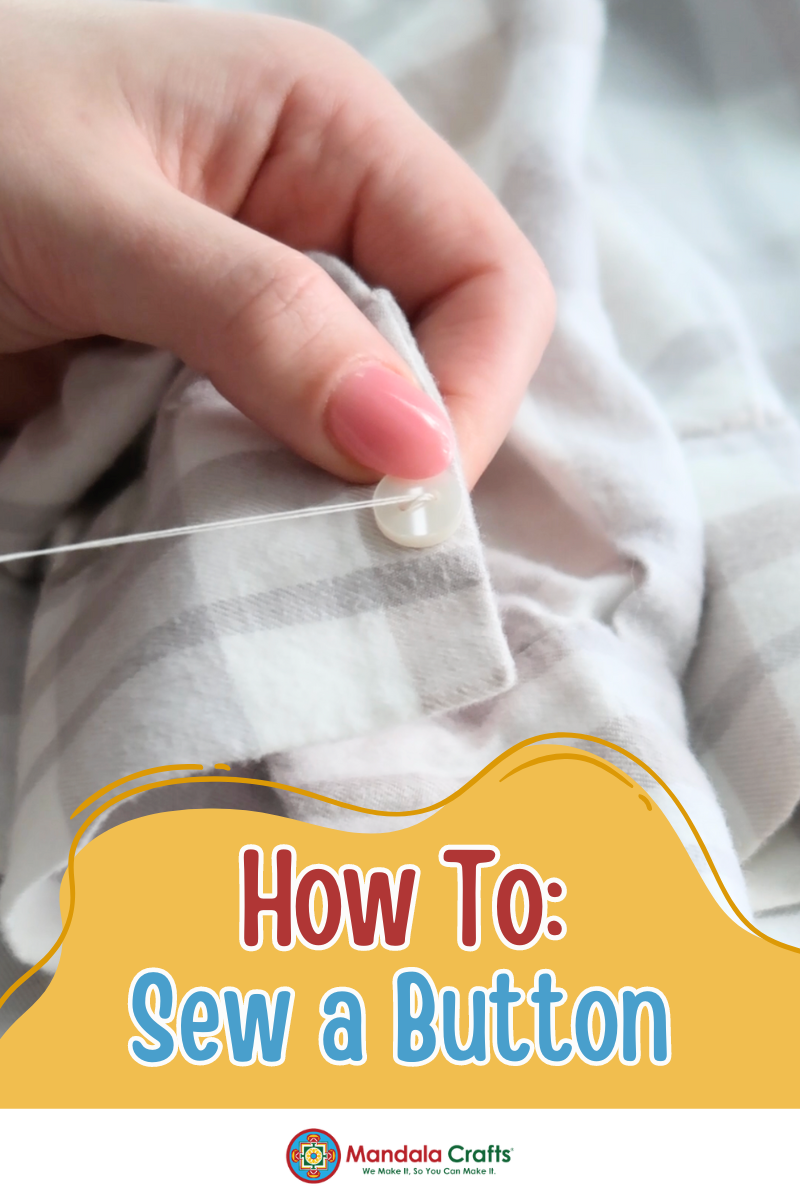
Have you ever found your favorite shirt or coat missing a button at the most inconvenient time? Don’t worry; sewing a button is a simple skill that anyone can master in just a few steps. In this blog post, I’ll guide you through how to sew a button securely, so you can repair your clothes quickly and easily.

What You’ll Need:
- Needle
- Thread (matching or contrasting color)
- Scissors
- The button
- Thimble (optional)

1. Choose the Right Thread:
Select a thread color that matches your fabric or, if you’re feeling bold, a contrasting color for a fun, visible touch. Cut a length of thread about 18-24 inches long. Thread your needle and tie a knot at the end.


2. Position the Button:
Place the button in its designated spot. If you’re replacing a missing button, check for any remaining thread or markings that indicate its original position. Line up your button with any existing buttonholes to ensure accuracy.

3. Begin Sewing:
Insert the needle from the underside of the fabric to bring it up through one of the buttonholes. Pull the thread all the way through until the knot stops it. Then, insert the needle down through the opposite buttonhole (if it’s a 2-hole button) or through one of the holes diagonally across (if it’s a 4-hole button).


4. Continue Sewing:
Repeat the process of going up and down through the buttonholes around 5-6 times, ensuring the button is securely fastened to the fabric. If it’s a 4-hole button, move to the other pair of holes and repeat.

5. Secure the Thread:
After your button is securely sewn, push the needle to the underside of the fabric. Make a small stitch close to where the needle exits, creating a loop. Pass the needle through the loop to make a knot. Repeat once or twice to ensure it’s secure.

6. Trim the Excess Thread:
Cut any excess thread close to the knot, being careful not to cut too close. Your button is now secure!

Tips and Tricks:
• Double Thread for Strength: For extra durability, use a double thread. Just fold a longer piece of thread in half and knot the ends together before threading the needle.
• Thimble for Protection: If you find it challenging to push the needle through thicker fabric, use a thimble to protect your finger.
• Practice Makes Perfect: The more you sew buttons, the easier it will become. Start with easy projects like sewing buttons on fabric scraps before moving on to your favorite clothing.
Sewing a button is a quick and easy way to extend the life of your clothes and add a personal touch to your wardrobe. With just a few simple steps, you can save time and money while developing a valuable skill.
Now, go ahead and grab that loose button—happy crafting!
@mandalacraftsinc I got it from my momma 🤗🧵🪡 Learn how to sew a button in 5 minutes or less. Everything in this video is from www.mandalacraftsinc.com 😊 Shop sewing thread, buttons, and more. #madewithmandala #mandalacraftsinc #sewing #sewingtutorial #sewingtiktok #sewingskills #sewing #sew #sewingbutton #sewingstudents #sewingbeginner #sewinghack #sewingsupplies #sewingthreads #sewingcrafts #craftsupplies #diycraftsupplies #craftingsupplies #howto #momhack ♬ Handsome Newsprint - DJ BAI